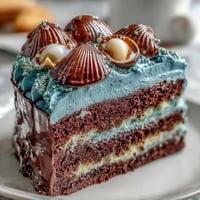
 Save
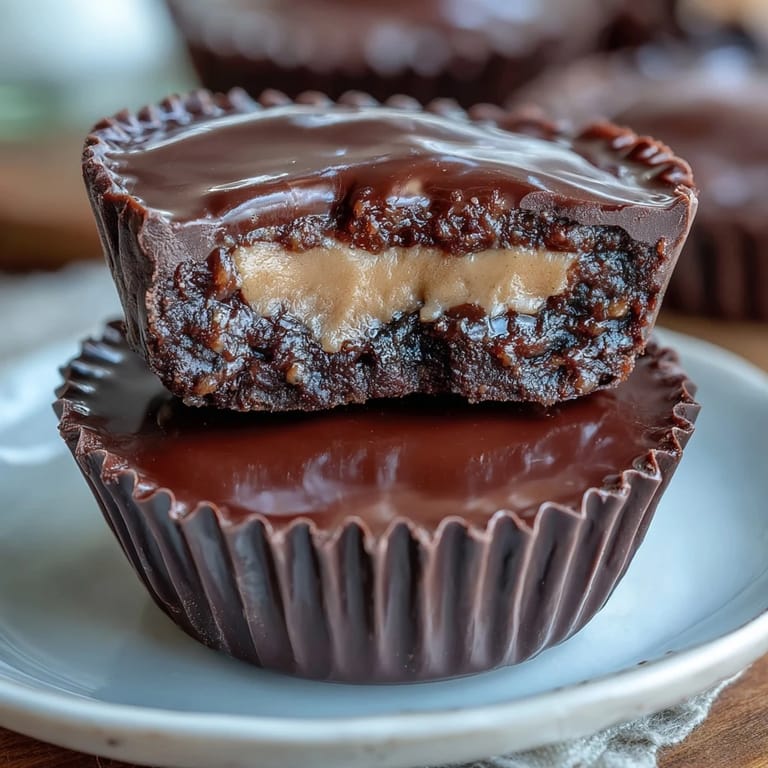
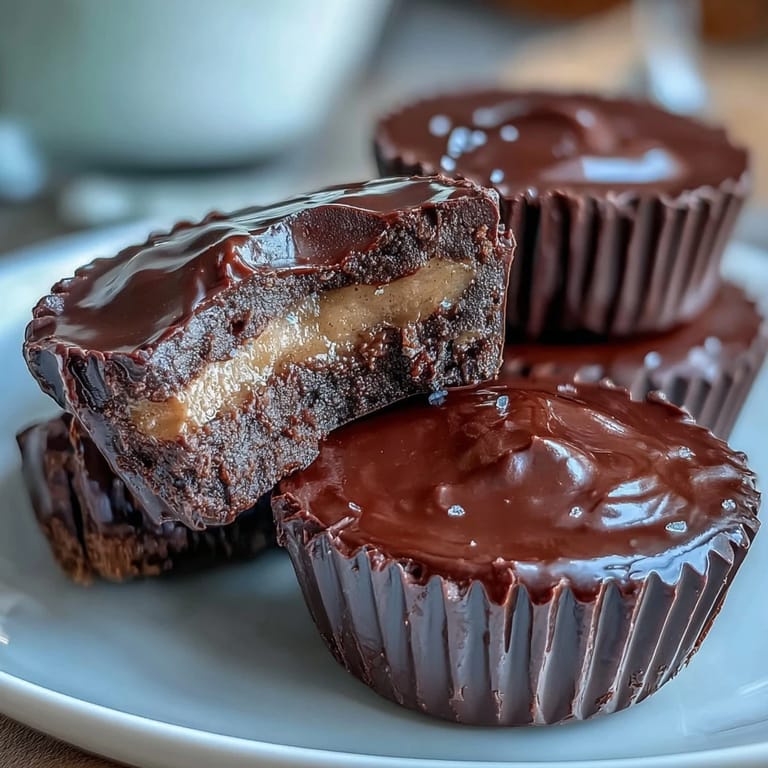
Save There's something magical about biting into a homemade peanut butter cup—the snap of rich dark chocolate giving way to a creamy, lightly salted peanut butter filling that melts on your tongue. These Homemade Reese's Peanut Butter Cups with Dark Chocolate bring that iconic candy store favorite into your own kitchen, with a gourmet twist that elevates the classic treat. Made with premium 70% dark chocolate and pure, creamy peanut butter, these indulgent cups offer the perfect balance of sweet and salty, rich and smooth. Whether you're satisfying your own chocolate cravings or preparing an impressive edible gift, this easy recipe delivers professional results with minimal effort and maximum flavor.
Save The secret to achieving that perfect candy-shop texture lies in the careful balance of ingredients and proper chilling time. Unlike store-bought versions loaded with preservatives and stabilizers, these homemade cups rely on quality butter and a touch of powdered sugar to create a filling that's both firm and creamy. The addition of vanilla extract adds depth, while a pinch of fine sea salt enhances the peanut butter's natural nuttiness and balances the sweetness of the dark chocolate. The optional coconut oil in the chocolate layer ensures a glossy finish and that satisfying snap when you bite through the shell.
Ingredients
Tired of Takeout? 🥡
Get 10 meals you can make faster than delivery arrives. Seriously.
One email. No spam. Unsubscribe anytime.
- Chocolate Layer: 250 g (9 oz) dark chocolate (70% cocoa or higher), chopped, and 1 tbsp coconut oil (optional, for smoother texture)
- Peanut Butter Filling: 120 g (½ cup) creamy peanut butter (unsweetened, unsalted preferred), 2 tbsp unsalted butter (softened), 60 g (½ cup) powdered sugar (sifted), ¼ tsp fine sea salt, and ½ tsp vanilla extract
Instructions
- Step 1: Prepare the Muffin Tin
- Line a 12-cup mini muffin tin with paper liners to ensure easy removal and clean presentation.
- Step 2: Melt the Chocolate
- Melt the dark chocolate and coconut oil together in a heatproof bowl set over a pan of simmering water, or microwave in short bursts, stirring until smooth.
- Step 3: Create the Chocolate Base
- Spoon about 1 teaspoon of melted chocolate into the bottom of each muffin liner. Tilt or use a spoon to coat the sides slightly. Chill in the freezer for 10 minutes to set.
- Step 4: Prepare the Peanut Butter Filling
- Meanwhile, in a medium bowl, mix peanut butter, butter, powdered sugar, salt, and vanilla extract until smooth and thick.
- Step 5: Add the Filling Layer
- Roll about 1 teaspoon of the peanut butter mixture into a ball, flatten slightly, and place onto the set chocolate bases. Gently press down to create an even layer, leaving a small border around the edge.
- Step 6: Seal with Chocolate
- Spoon the remaining melted chocolate over the peanut butter layers, covering completely. Tap the tin gently to smooth the tops.
- Step 7: Set and Store
- Chill in the refrigerator for at least 30 minutes, or until fully set.
- Step 8: Serve
- Remove cups from liners and serve. Store in an airtight container in the refrigerator for up to 1 week.
Zusatztipps für die Zubereitung
For the smoothest chocolate coating, ensure your chocolate is completely melted with no lumps before beginning. If using a microwave, heat in 20-second intervals, stirring between each, to prevent scorching. When creating the peanut butter filling, make sure your butter is properly softened to room temperature—this ensures easy mixing and a silky texture. If the filling feels too soft to work with, refrigerate it for 5-10 minutes before rolling into balls. For perfectly centered filling, use a small cookie scoop for consistent portions. The gentle tapping of the muffin tin after adding the final chocolate layer helps release air bubbles and creates a professional, smooth top surface. Don't skip the chilling time—patience ensures the layers set properly and the cups release cleanly from their liners.
Varianten und Anpassungen
These peanut butter cups are wonderfully adaptable to various dietary preferences and flavor experiments. For a vegan version, simply replace the unsalted butter with a dairy-free alternative and ensure your dark chocolate contains no milk solids. Adventurous bakers can swap the peanut butter for almond butter, cashew butter, or even sunflower seed butter for a nut-free option. Add texture by folding crushed pretzels or crispy rice cereal into the peanut butter filling before assembling. For extra indulgence, place a whole roasted peanut in the center of each cup before sealing with chocolate. A sprinkle of flaky sea salt on top before the final chilling adds a gourmet touch and enhances the sweet-salty contrast. You can also experiment with different chocolate percentages—milk chocolate for a sweeter version or 85% dark for a more intense, sophisticated treat.
Serviervorschläge
These homemade peanut butter cups shine as an after-dinner treat, paired beautifully with a cup of freshly brewed coffee or espresso—the bitter notes of the coffee complement the rich chocolate perfectly. For a more indulgent dessert experience, serve them alongside a glass of cold milk or plant-based alternative. They make an elegant addition to dessert platters at parties, especially when arranged on a slate board with fresh berries and a dusting of cocoa powder. Pack them in decorative boxes or mason jars for thoughtful homemade gifts during holidays or special occasions. For a fun twist, slightly warm them for 5-10 seconds in the microwave to achieve a soft, melty center that's absolutely decadent. They're also perfect for tucking into lunchboxes as a special treat or enjoying as an afternoon pick-me-up with tea.
 Save
Save With just a handful of quality ingredients and less than an hour from start to finish, these Homemade Reese's Peanut Butter Cups with Dark Chocolate prove that the best treats are often the simplest. Each bite delivers that nostalgic candy store experience elevated by the richness of premium dark chocolate and pure peanut butter, free from unnecessary additives or artificial flavors. Whether you're treating yourself, impressing guests, or creating heartfelt edible gifts, these cups deliver consistent, crowd-pleasing results every time. Keep a batch in your refrigerator for those moments when only the perfect combination of chocolate and peanut butter will do—you'll never go back to store-bought again.
Cooking Guide
- → What type of chocolate is best for the coating?
Dark chocolate with 70% cocoa or higher works best, providing a rich, slightly bitter contrast to the sweet filling. Coconut oil can be added for smoothness.
- → How can I make these cups vegan?
Substitute dairy butter with a plant-based alternative and ensure the chocolate is dairy-free to make a vegan-friendly version.
- → Can I use different nut butters in the filling?
Yes, almond or cashew butter can be used instead of peanut butter for a unique flavor twist.
- → How long should the cups chill before serving?
They need at least 30 minutes in the refrigerator to fully set and hold their shape.
- → What tools do I need to prepare these cups?
A mini muffin tin, paper liners, mixing bowls, a spoon or small spatula, and a heatproof bowl for melting chocolate are required.
- → Can these cups be stored for later?
Yes, store them in an airtight container in the refrigerator for up to one week to maintain freshness.