 Save
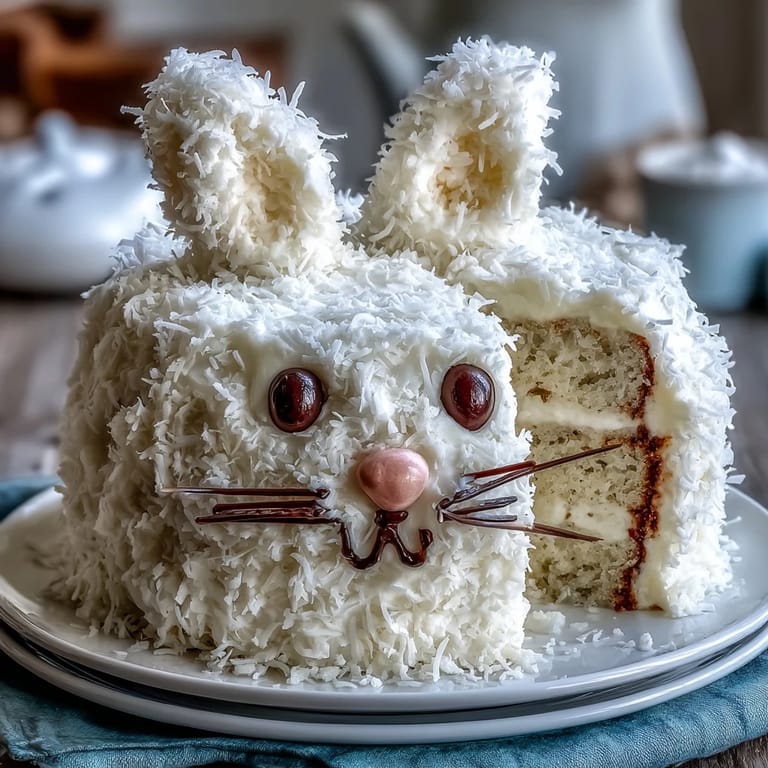
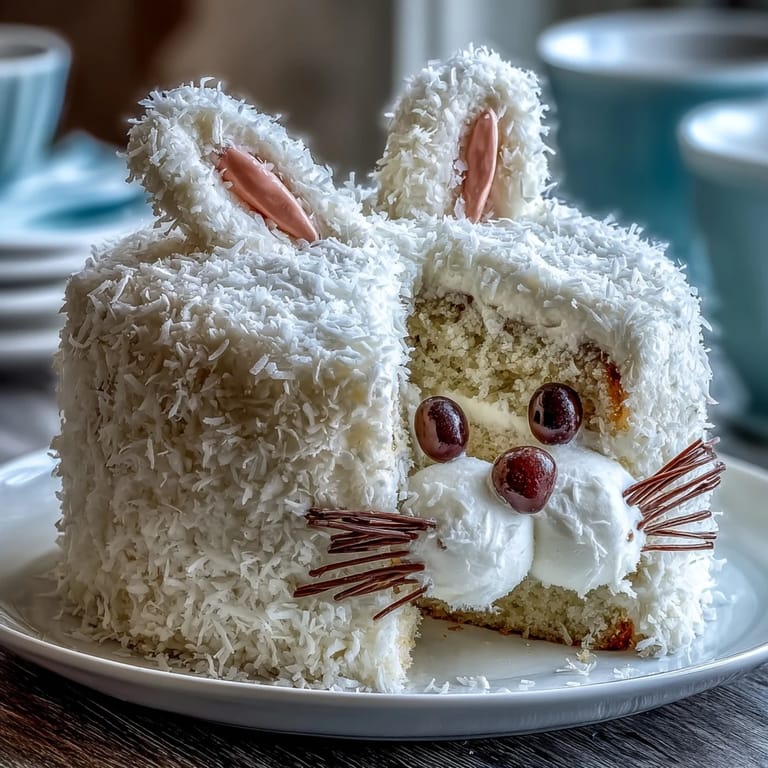
Save My daughter's face lit up when she saw the Easter Bunny cake at a bakery window, and I knew right then I had to make one. There's something about a cake shaped like a fluffy bunny that transforms dessert from ordinary into pure magic—the kind of thing kids talk about for weeks after. I grabbed my mixer that afternoon, remembering how my own mom used to shape cakes into animals for special occasions, and decided to recreate that joy in our kitchen. The vanilla layers and coconut frosting seemed simple enough, but watching it come together into a whimsical bunny face made all the effort feel worthwhile. Now it's our Easter tradition.
I'll never forget the Easter brunch when my youngest insisted on serving the bunny cake before the meal even started—and nobody complained. Grandparents were taking photos, cousins were laughing at the licorice whiskers, and suddenly this cake became the centerpiece of the whole celebration, not just dessert. That's when I realized it wasn't really about the ingredients or technique; it was about creating a moment that felt special and a little bit silly in the best way.
Ingredients
- All-purpose flour (2 ½ cups): Use fresh flour for the softest crumb; old flour sitting in your cabinet can make the cake denser than intended.
- Baking powder (2 ½ tsp): This is your lift—don't skimp or use old baking powder that's lost its power over time.
- Unsalted butter (1 cup for cake, 1 cup for frosting): Room temperature is non-negotiable; cold butter won't cream properly and you'll end up with a dense cake.
- Granulated sugar (2 cups): This sweetens and aerates the batter when beaten with butter, creating that tender crumb.
- Eggs (4 large): Also room temperature—they blend into the batter more smoothly and create better structure.
- Pure vanilla extract (1 tbsp for cake, 1 ½ tsp for frosting): Real vanilla makes a noticeable difference in flavor compared to imitation.
- Whole milk (1 cup for cake, ¼ cup for frosting): The milk keeps the cake moist and tender without being greasy.
- Powdered sugar (4 cups): Sift it first to avoid lumpy frosting that never smooths out properly.
- Sweetened shredded coconut (2 cups): This creates that fluffy, adorable bunny texture everyone loves—don't skip it.
- Food coloring, jelly beans, licorice, marshmallows, edible gel: These turn your cake into a character with personality and charm.
Tired of Takeout? 🥡
Get 10 meals you can make faster than delivery arrives. Seriously.
One email. No spam. Unsubscribe anytime.
Instructions
- Prep your pans and preheat:
- Get your oven to 350°F and grease those round pans thoroughly, then dust with flour so the cake releases cleanly. This step takes two minutes but saves you heartbreak later when you're trying to turn out your cake layers.
- Mix your dry ingredients:
- Whisk flour, baking powder, and salt together in a bowl—this distributes the baking powder evenly so you get even rise. Don't skip this; lumpy batter means uneven cake.
- Cream butter and sugar until fluffy:
- Beat for about three minutes until the mixture is pale and looks almost like mousse—this incorporates air and creates that tender crumb. You'll hear the mixer working a bit harder as it lightens; that's exactly what you want.
- Add eggs one at a time:
- Beat well after each egg so it fully incorporates before adding the next one. Rushing this step can cause the batter to break or become grainy.
- Add vanilla and alternate wet and dry:
- Mix in the vanilla first, then add flour mixture and milk in alternating batches, starting and ending with flour. Stir just until combined—overmixing develops gluten and makes the cake tough instead of tender.
- Divide and bake:
- Split batter evenly between pans and smooth the tops so they bake uniformly. Bake for 30-35 minutes until a toothpick comes out clean, then cool in pans for ten minutes before turning out onto racks to cool completely.
- Make the coconut frosting:
- Beat butter until creamy, then gradually add sifted powdered sugar, milk, and vanilla until light and fluffy. This takes patience—don't dump everything in at once or you'll have powdered sugar clouds everywhere.
- Tint half the frosting pink:
- Set aside half a cup and add food coloring drop by drop until you reach the shade you want for bunny ears and nose. Too much coloring at once and you'll overshoot the color.
- Cut and assemble the bunny:
- Use one round cake as your bunny face and cut the other into ear shapes and a bow tie—search online for a template if you're unsure. Arrange everything on a large board or platter, positioning pieces slightly overlapped so they stay stable.
- Apply crumb coat and chill:
- Spread a thin layer of white frosting over the whole cake to seal in crumbs, then refrigerate for fifteen minutes. This keeps your final frosting looking clean and professional instead of speckled.
- Frost generously and add coconut:
- Apply frosting thickly, then immediately press shredded coconut onto all surfaces while frosting is still soft. Work in sections so the frosting doesn't set before you get coconut on it.
- Decorate with personality:
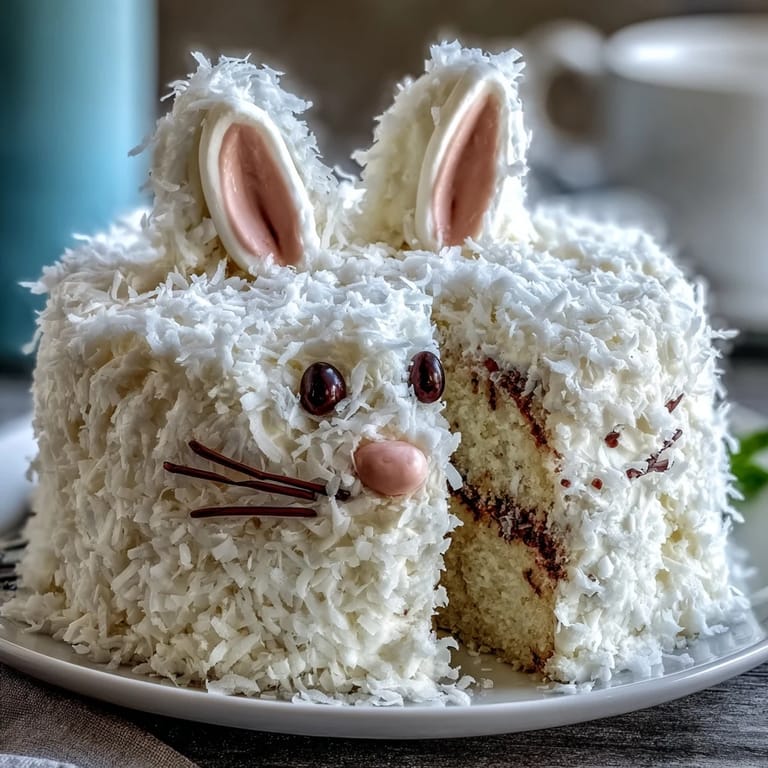
- Fill in inner ears and nose with pink frosting, add jelly beans or candies for eyes, licorice strings for whiskers, marshmallows for cheeks and tail, and chocolate chips or gel for nose details. Have fun with this part—it's where your bunny gets its character.
 Save
Save One Easter morning, my son insisted on making this cake completely by himself while I supervised from a stool with coffee in hand—he was six, determined, and absolutely convinced he could do it. Watching him carefully press coconut onto every surface, tongue poking out in concentration, then stepping back to admire his slightly lopsided bunny with genuine pride reminded me that the cake doesn't have to be perfect to be perfect. That misaligned nose and a few gaps in the frosting became the most charming part.
Shaping Your Bunny with Confidence
The bunny shape might seem intimidating if you're picturing some complicated carving technique, but it's actually just smart cutting and clever arrangement. One round cake stays as the face, and the second cake gets cut into two ear shapes and a bow tie piece—think of it like a puzzle where all the pieces still look intentional even if they're not perfectly symmetrical. The beauty of decorating heavily with coconut and frosting is that it softens any hard lines or uneven cuts, making everything look cohesively fluffy and cute.
Make-Ahead Magic and Storage Tips
I usually bake the cake layers a day or two ahead, which removes so much stress from party day—just wrap them tightly and they stay fresh and moist. The frosting comes together in minutes on the actual day, and you can even frost the whole bunny hours ahead as long as you keep it somewhere cool. If your kitchen runs warm, a quick chill in the fridge before serving keeps everything looking pristine and helps the frosting hold its shape.
Flavor Tweaks and Crowd-Pleasing Alternatives
The vanilla-and-coconut combination is classic for a reason, but I've experimented with toasted coconut when I wanted deeper flavor, and it elevated the whole thing. If someone at your table isn't coconut-obsessed, you can tone down the coconut layer or swap the frosting entirely for cream cheese frosting, which adds tanginess and pairs beautifully with the vanilla cake. For a fancier crowd, a light Moscato or even sparkling lemonade beside the cake feels appropriately festive without competing with the dessert.
- Try almond extract in place of half the vanilla for a subtly different flavor that still feels familiar.
- Toasted coconut takes five minutes under the broiler and transforms the flavor profile from sweet to more sophisticated.
- Cream cheese frosting is thinner than buttercream, so you'll need to chill the cake longer between coats to build layers.
 Save
Save This cake has become our Easter signature, the thing people ask about before we've even sent invitations. It reminds me every single year that the best desserts aren't always about technical perfection—they're about showing up with a little imagination and a willingness to have fun in the kitchen.
Cooking Guide
- → How do I shape the cake into a bunny?
After baking, cut one round cake into ear and bow tie shapes using a serrated knife, then arrange on a board with one full round as the face.
- → Can I prepare the layers in advance?
Yes, cake layers can be baked a day ahead and stored wrapped tightly to maintain freshness before assembly.
- → What frosting alternatives work well with this cake?
Toasted coconut frosting or cream cheese frosting can be used instead of standard coconut for added flavor variations.
- → How is the coconut frosting made fluffy?
Beat softened butter until creamy, then gradually add powdered sugar, milk, and vanilla, beating until light and fluffy before folding in shredded coconut.
- → Are there any suggested beverage pairings?
This dessert pairs nicely with light Moscato wine or refreshing lemonade to complement its sweet and festive flavors.