 Save
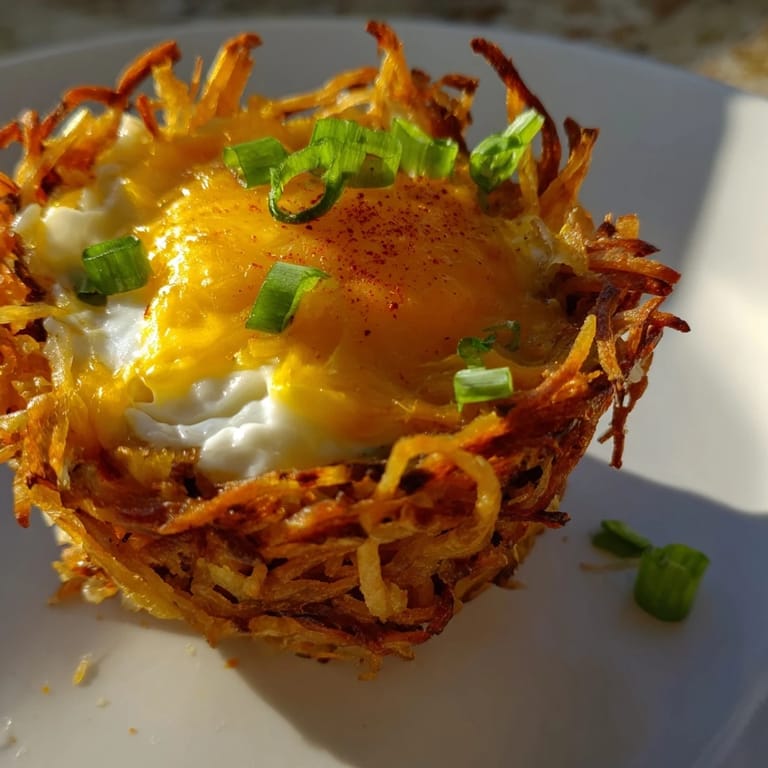
Save I stumbled on this recipe one Saturday morning when I had leftover shredded potatoes and a muffin tin staring at me from the cabinet. The idea of pressing potato into those little cups felt almost like an experiment, but the second batch came out golden and crackling at the edges, and I knew I had something worth repeating. My partner wandered into the kitchen following the smell of butter and crisping starch, and by the time I cracked eggs into those nests, we were both hovering by the oven door. Theres something deeply satisfying about food that holds its own shape and delivers texture in every bite. These little cups became our weekend ritual without us ever planning it.
The first time I made these for a brunch with friends, I almost panicked because I thought the potatoes wouldnt hold their shape. But once they came out of the oven, sturdy and golden, I felt like I had pulled off magic. Everyone grabbed two, and one friend asked if I had used a special tool to mold them. I just smiled and said it was a muffin tin and some patience.
Ingredients
- Shredded russet potatoes: Russets have the right amount of starch to hold together when pressed, and rinsing them removes excess starch that would make them gummy instead of crispy.
- Melted unsalted butter: This coats every shred and helps the edges caramelize beautifully in the oven, plus it adds a richness that oil alone cant match.
- Large eggs: They need to be fresh so the yolks sit high and dont spread too thin, which makes for a prettier and more satisfying bite.
- Shredded cheddar cheese: Sharp cheddar melts into the egg and potato, creating pockets of salty, tangy flavor that contrast with the mild starch.
- Chopped scallions or chives: A handful of these brings a bright, grassy note that cuts through the richness and makes each bite feel lighter.
- Paprika: Just a pinch on top adds a subtle warmth and a pop of color that makes the nests look finished.
Tired of Takeout? 🥡
Get 10 meals you can make faster than delivery arrives. Seriously.
One email. No spam. Unsubscribe anytime.
Instructions
- Prepare Your Oven and Pan:
- Preheat your oven to 400°F and grease every cup of your muffin tin generously with butter or nonstick spray. If you skip this step, youll be prying the nests out with a knife and losing those crispy edges you worked for.
- Season and Coat the Potatoes:
- Toss the shredded, drained potatoes with salt, pepper, and melted butter in a large bowl until every strand glistens. This is where the flavor starts, so dont rush it.
- Form the Nests:
- Press about a quarter cup of potato mixture into each muffin cup, pushing it firmly up the sides to create a bowl shape. The thinner you press the sides, the crispier theyll get, but make sure theres no gap at the bottom.
- Bake the Potato Shells:
- Slide the pan into the oven and bake for 15 to 20 minutes, watching for the edges to turn deep golden. The smell of toasting butter and potato will fill your kitchen, and thats your cue to check on them.
- Add the First Layer of Filling:
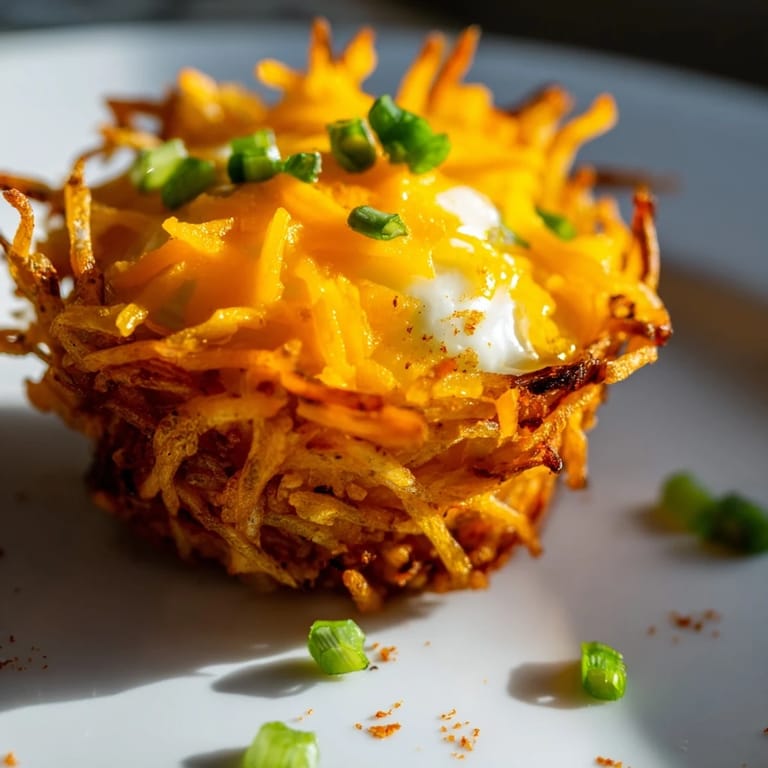
- Pull the pan out and sprinkle a small handful of cheese and scallions into each nest. This creates a flavorful bed for the egg and keeps the yolk from sinking straight through.
- Crack in the Eggs:
- Gently crack one egg into each nest, trying to keep the yolk centered. Dust the tops with paprika, then scatter the remaining cheese and scallions over everything.
- Finish Baking:
- Return the pan to the oven and bake for 10 to 12 minutes, depending on how runny you like your yolks. I like mine just set, with a little wobble left in the center.
- Cool and Remove:
- Let the nests cool in the pan for a few minutes, then run a butter knife gently around the edges to release them. Theyll lift out cleanly if you greased the pan well, and the bottoms should be golden and firm.
- Serve:
- Plate them warm, scatter extra chives on top, and set out hot sauce for anyone who wants a kick. They taste best within the first few minutes, when the steam is still rising and the cheese is molten.
 Save
Save One Sunday morning, I made a double batch of these for my family, and my youngest niece carefully peeled back the crispy potato edge before eating the egg in one bite. She looked up at me with yolk on her chin and said it was like eating a treasure. I think about that every time I make them now, how something this simple can feel like a small gift when you share it.
How to Get Extra Crispy Edges
The secret is letting the potato shells bake alone for a full 20 minutes before you even think about adding the eggs. I learned this after a few batches came out soft and floppy, and I realized the egg moisture was steaming the potato instead of letting it crisp. If you see pale spots on the sides, give it another two minutes, because those golden edges are what make the dish special.
Flavor Variations to Try
Once you nail the basic version, you can fold in cooked bacon bits, sauteed mushrooms, or diced bell peppers before adding the egg. I once stirred a teaspoon of hot sauce into the potato mixture itself, and it gave the whole nest a subtle heat that built with each bite. Swapping cheddar for pepper jack or gouda changes the personality completely, and a sprinkle of fresh dill instead of chives brings a brighter, almost pickled note that pairs beautifully with smoked salmon if youre feeling fancy.
Make Ahead and Storage Tips
You can form and bake the potato nests the night before, let them cool completely, then cover and refrigerate them. In the morning, just crack the eggs in and bake for an extra minute or two since theyre starting cold. Leftovers keep in an airtight container for up to two days, and you can reheat them in a 350°F oven for about eight minutes to bring back some of that crispness.
- If youre meal prepping, freeze the baked nests without eggs, then thaw and add eggs fresh when youre ready to eat.
- Reheat in the oven, not the microwave, or the potato will turn soggy and the eggs will get rubbery.
- These also work beautifully as a portable breakfast if you let them cool completely and wrap them individually in foil.
 Save
Save These little nests have become one of those recipes I make without thinking, the kind that feels like muscle memory and always delivers. I hope they bring you the same kind of easy joy they bring me, especially on mornings when you want something warm, crispy, and just a little bit special.
Cooking Guide
- → How do I achieve crispy hashbrown nests?
Ensure potatoes are rinsed and thoroughly dried before mixing with melted butter, salt, and pepper. Press them firmly into muffin tins and bake until edges turn golden and crisp.
- → Can I prepare the nests in advance?
You can partially bake the potato shells ahead and add the fillings just before serving for fresher results.
- → What variations can I try for the filling?
Replace cheddar with Swiss, mozzarella, or pepper jack cheese. Add cooked bacon or sautéed vegetables to enhance flavors.
- → What is the best method to cook the eggs inside the nests?
Crack an egg directly into each baked potato nest and bake until the eggs are set to your preferred doneness, generally 10–12 minutes.
- → How do I prevent potatoes from getting soggy?
Rinsing and drying shredded potatoes removes excess starch and moisture, helping the nests crisp up during baking.